





 by
Last reviewed on October 22, 2026 (originally published on March 15, 2016)
Plyometrics are explosive exercises that increase speed, quickness and power. Most exercises include “jumping,” in which the muscles exert maximal effort and force in short bouts or intervals of time. The goal is to move from the eccentric to concentric phase of a movement rapidly while using proper biomechanics.
Plyometrics are often used to train athletes or highly fit individuals. Because they require high force and can be tough on the upper- and lower-extremity joints, especially the shoulders and knees, intense plyometrics are not recommended for novice exercisers until appropriate strength, flexibility and postural mechanics have been developed. Anyone incorporating plyometric exercises should have an established workout and strength routine, because many of these exercises require strong ligaments and tendons. Individuals can gradually progress into the level one exercises described below before incorporating more advanced and explosive moves. Some clients may never advance to performing true explosive plyometric exercises, but can benefit from lower-intensity movements.
Reps or timed work-to-recovery intervals can be incorporated into both one-on-one or group fitness settings. Traditionally, the more explosive the movement, the shorter the work period should be, followed by a longer recovery period. The work phase can be as short as three reps or 10 seconds, while recovery can be as short as 20 seconds or as long as two minutes. Recovery is important for ensuring proper biomechanics and mental focus.
The following exercises are intended for more advanced clients. However, even explosive plyometrics can be progressed. The following workout demonstrates three levels of explosive plyometrics, which can be incorporated, as appropriate, into a client’s training program.
Precautionary Guidelines
Plyometric drills should be performed at the beginning of a training session after the
completion of a dynamic warm-up (while clients are not fatigued) to reduce the risk
of injury.
Proper technique is crucial. Clients should not jump unless they know how to land.
Ensure that clients are capable of landing correctly by initially teaching small, low-intensity
jumps and using appropriate landing techniques.
Level One
Lateral Bounds
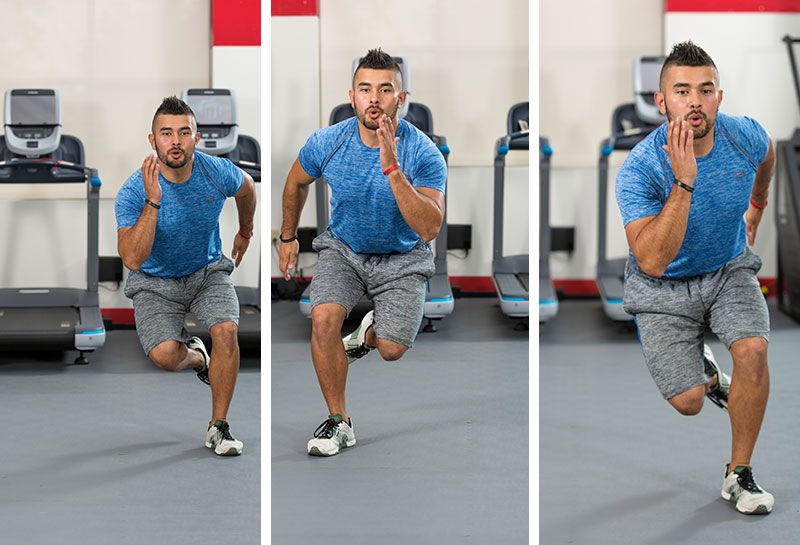
Begin in an athletic stance with the knees bent and torso upright. Jump laterally to the right as the arms come forward. Land on the right foot as the left foot stays behind the right leg. Repeat the lateral movement to the left.
Squat Jumps
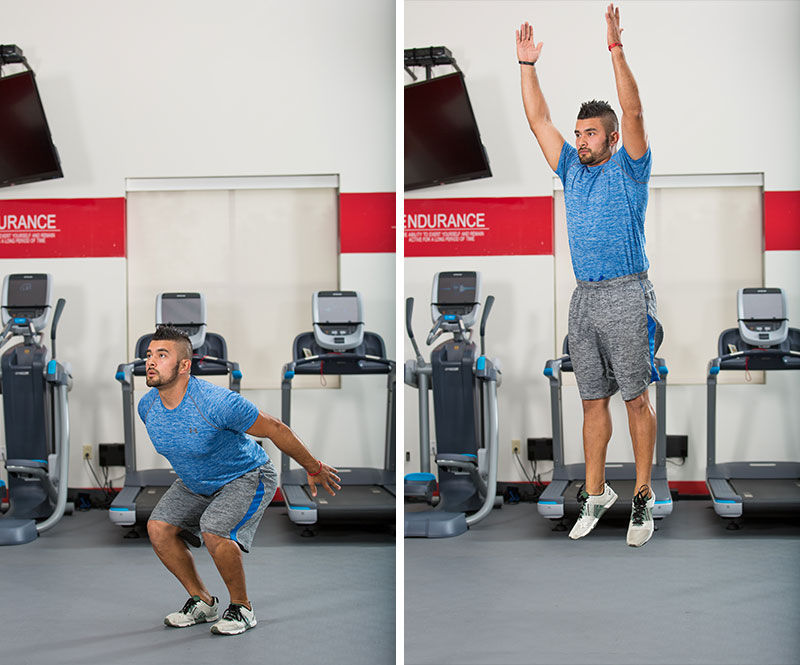
Stand tall with the feet shoulder-distance apart. Lower the body into a squat position; pull the elbows back and use the arms to explosively burst or jump up. Reach the arms overhead as the feet leave the floor. Land softly, lower the body and repeat the jumping motion.
Plyo Reverse Step (or Lunge) With Jump
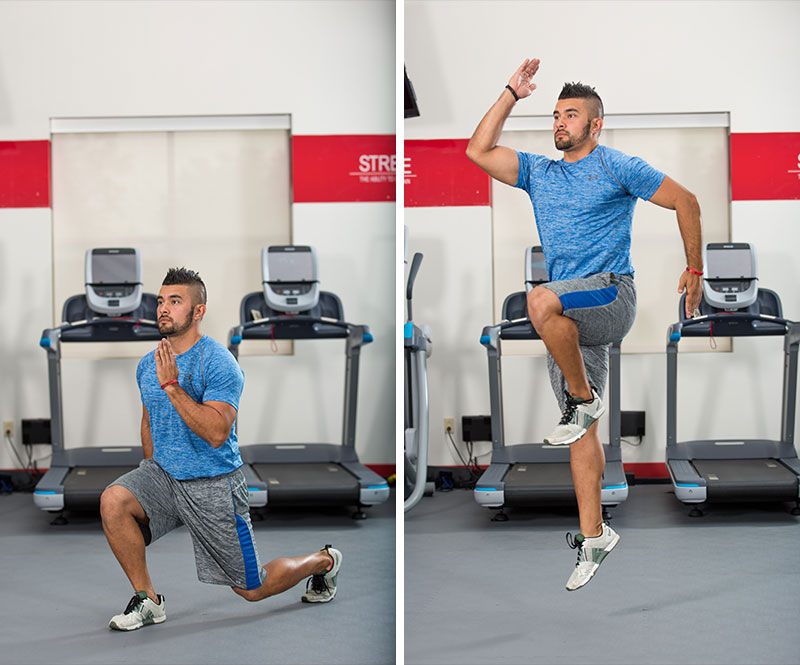
Stand tall with feet hip-distance apart. Reach the left leg back and touch the floor with the ball of the foot (or lunge for a more challenging exercise) while the left arm comes forward. Explode the body upward as you drive the left knee forward. The right arm will reach overhead. Repeat the first side for the desired amount of time or number of repetitions before switching.
Level Two
Squat Thrusters
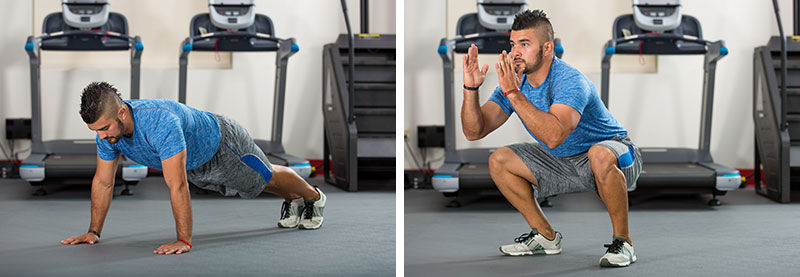
Begin in a high-plank position. Jump the feet forward and land the body into a squat position. Draw the elbows close to the knees. Jump the body back into a high plank and repeat.
Plyo Push-Ups
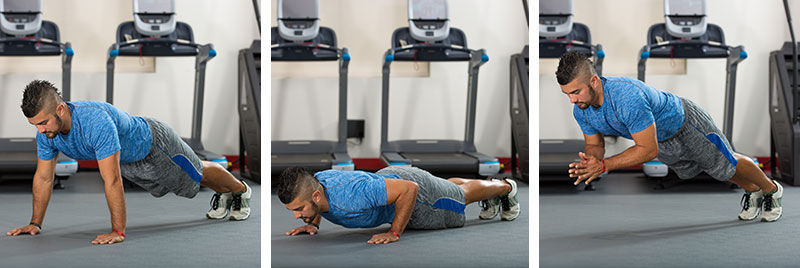
Start in a high-plank position with the hands set up for a push-up. Lower the body into a push-up position and explode upward. As the arms straighten, lift the hands off the ground and clap them together. Release the hands quickly to the starting position and repeat. To make it more challenging, lift the feet off the ground as well.
Single-Leg Deadlift With Jump
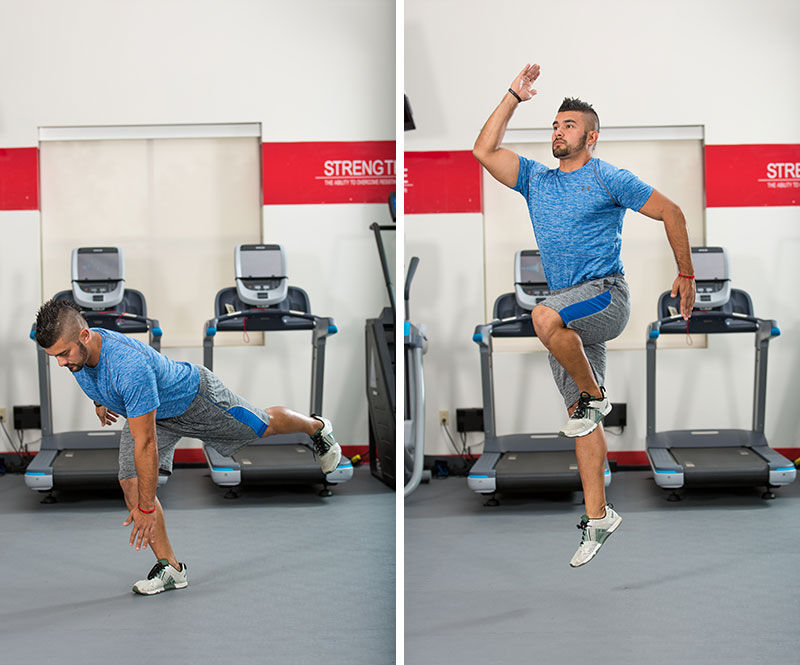
This is the more challenging version of the plyo reverse lunge with jump, as it focuses on stabilization and explosion of one leg. Stand tall and step the left foot back behind the body. For those with good balance, do not touch the left foot on the ground. Bring the body parallel to the ground, reach the left hand toward the floor (similar to Warrior III in yoga) and bring the left foot level with the hip. Begin to come upright and explode upward. The left knee will drive up while the right arm reaches overhead and the right foot lifts off the ground. Complete a set on the first side before switching to the other side.
Level Three
Box Jump
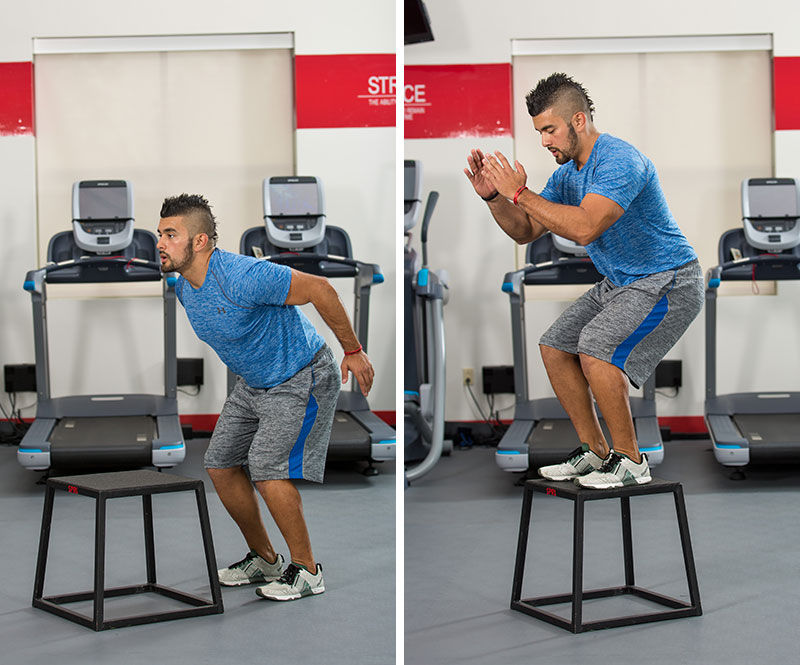
Choose a box height that suits your current fitness level. Stand facing the box and lower the body into a squat position. The arms will naturally raise in front of the body. Begin to jump up and forward while lifting the knees. The arms will naturally swing behind the body as you land on the box in an athletic stance or squat position. Step off the box, reset and repeat.
Burpee With Knee Tuck
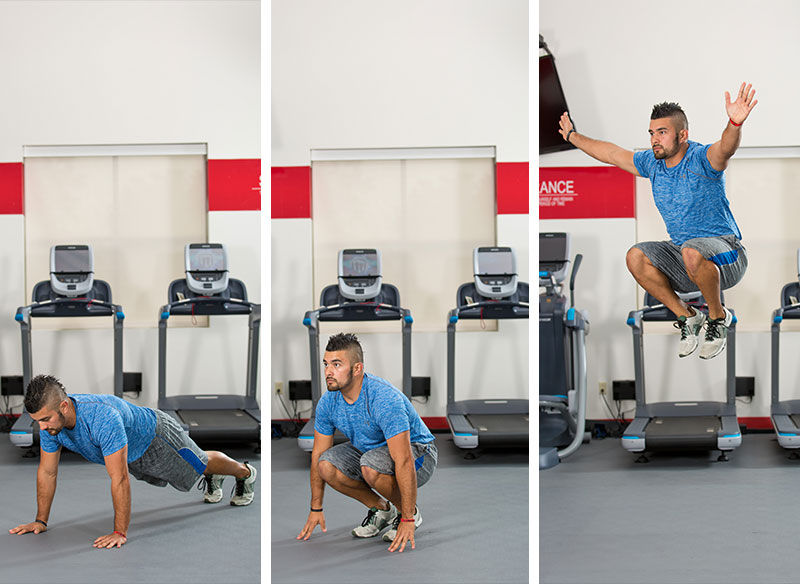
Complete a traditional burpee (complete the push-up to increase the challenge). On the up phase, jump and tuck the knees up toward the chest. Land softly on the balls of the feet first and then the heels. Repeat the movement. If the tuck doesn’t work, continue with a traditional burpee followed by a 180-degree turn.
Alternating Lunge Jumps
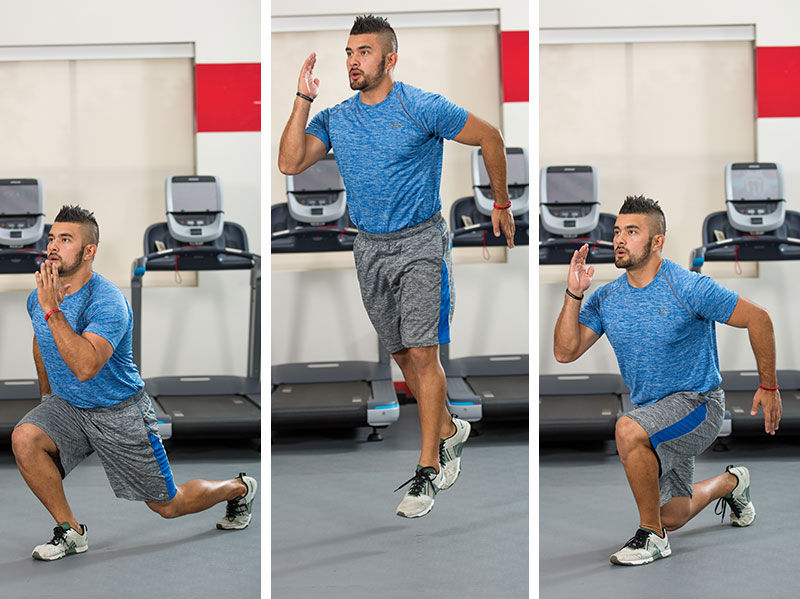
Start in a lunge position with the right foot forward and the left leg behind. Lower the back knee to the floor. Propel upward, lifting both feet from the ground and quickly switching the foot position (the left foot should now be in front). Repeat, alternating legs each time.






 by