Pilates focuses on the strengthening and support of the core muscles, as well as proper postural and breathing techniques for optimal movement of the body. These movements target the spine and its supporting muscles. Many people with chronic back pain have felt their aches diminish with regular Pilates sessions. While equipment-based Reformer sessions can be costly and group mat classes may not target your specific needs, many Pilates exercises can help realign your movement patterns to prevent and lessen common back pain.
Here are 10 moves that, when practiced regularly, can help improve posture and strengthen the support structures that take pressure off the lower back. Perform each of these exercises six to eight times, unless otherwise specified.
1. The Standing Roll-up
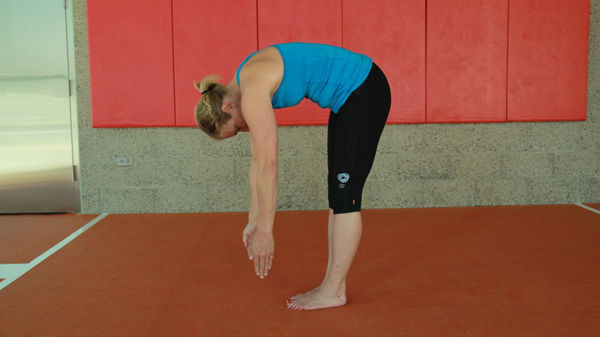
Benefits: This move helps the exerciser practice sequencing the spine with the use of gravity.
How to: Beginners should start standing up with arms reaching overhead. Hold a Pilates circle or lightweight ball in the hands to keep proper distance between the arms and to lead the direction of movement. Take a deep breath in and then slowly reach forward and downward toward the floor, allowing your chin to drop toward your chest. Roll in a smooth motion toward the floor, exhaling as you bend. Take a slight pause at the bottom of the movement to inhale breath again and then slowly exhale as you reverse the movement and roll the body up to a stretched standing position.
Tips: Try not to let the hips drop backward as you roll down and up. More advanced participants may perform this movement with their backs toward a wall to remind them to keep hips from pushing backward while rolling up and down.
2. The Floor Roll-up
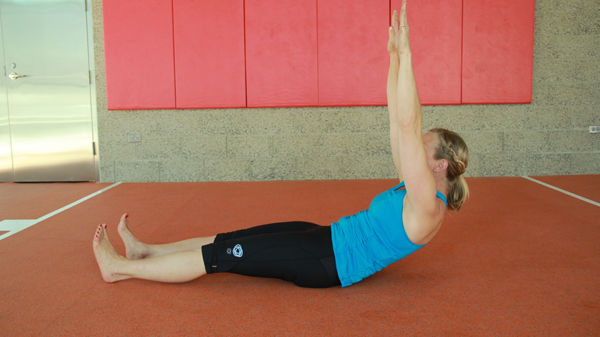
Benefits: The floor roll-up helps the exerciser practice sequencing the spine against gravity, while focusing on using the core to lift the body upward.
Directions: Beginners should start lying down with arms reaching overhead. Hold a Pilates circle or lightweight ball in the hands to keep proper distance between the arms and to lead the direction of movement. Take a deep breath in and then slowly reach the arms upward. Keep the arms behind the head and roll up to a seated position with your arms reaching towards the ceiling, exhaling as you lift. Once at the top of the seated position, continue to reach forward, allowing the upper back to bend forward with arms stretching over feet. Take a slight pause while reaching over the shins, and inhale again as you slowly lift the upper body to a seated position. Exhale as you roll the body down, returning to the long stretch position on the floor.
Tips: Think of rolling the body up and down, feeling each part of the back, rib cage and head move like dominos connected throughout the movement. Try not to jerk up to the seated position or fall back into the floor on the second half of movement.
3. Roll Like a Ball
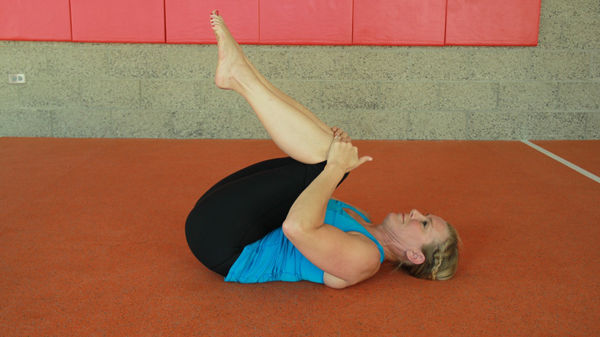
Benefits: This movement gently massages the muscles of the back and helps teach stabilized core movement.
Directions: Start in a seated position with the knees bent and the hands gently resting on the shins. Slowly lean back and roll like a ball to your shoulder blades as you inhale and return to a seated tuck position as you exhale. Keep the movement fluid and slow as you roll back and forth.
Tips: Try to keep your toes lifted on the roll up and balance at the top. As you progress, hold onto the ankles and extend the legs farther away from the body to a straight-leg position, balancing at the top of the movement.
4. Hundreds
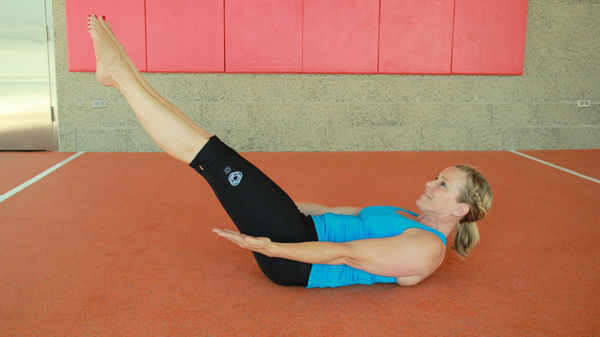
Overview: This quintessential Pilates exercise helps coordinate breathing with activation of the core muscles.
Directions: Start lying on your back with the knees bent as if they were resting on a coffee table. Inhale to prepare and exhale as you curl the head and tops of the shoulders off the floor; reach your hands past your hips. Gently pulse the hands downward and forward as you inhale and expand the breath to your belly for five counts. Exhale as you pulse five more times and press your lower belly down into the spine to tighten the core with your breath. Repeat this movement pattern of pulses and inhaling/exhaling for 10 sets (10 pulses in 10 sets = 100).
Tips: As you progress with your core stabilization, extend the legs to 45 degrees on the exhale and return to a soft bent knee on the inhale.
5. Bridge Roll-ups
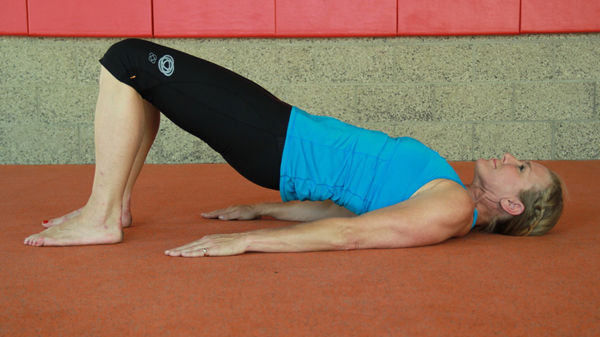
Overview: This movement helps unlock the lower spine and coordinate the pelvic floor and lower back muscles to allow the lower back to become stronger and more stable.
Directions: Start lying face up on the floor, with knees bent and arms at your sides. Widen across the chest and slowly tilt the pelvis toward the belly as you inhale. Take four counts as you exhale and peel the lower back off the floor one vertebrae at a time to lift the hips. Think of scooping the hips under as you raise them off the floor. In the next part of the movement, breathe in at the top and then exhale four counts as you slowly lower the upper back, rib cage, hips and finally the glutes onto the floor.
6. Superman
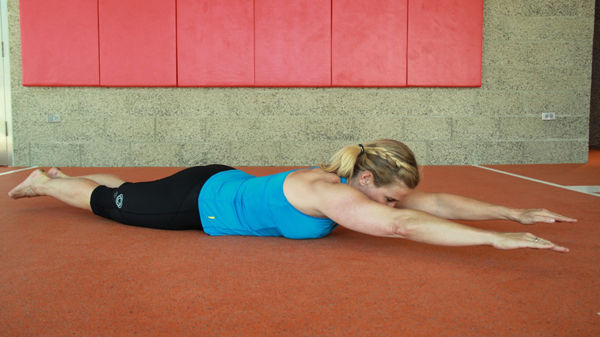
Overview: This exercise strengthens the hips and the long muscles along the spine to help improve posture.
Directions: Start lying face down on the floor with the arms and legs extended and shoulder- to hip-distance apart. Inhale as you lift the arms and legs 1 to 2 inches off the floor; hold the lift as you exhale slowly. Lower to the floor as you inhale and lift and hold while exhaling. Keep your gaze slightly in front of the body to keep the neck relaxed. Complete 10 repetitions.
7. Swimming
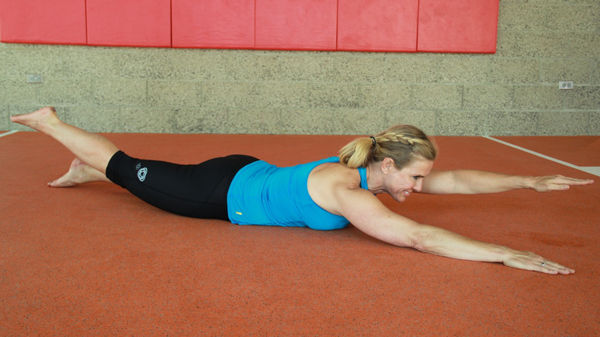
Overview: This exercise works the opposing long muscles of the back and spine.
Directions: Start lying face down on the floor with the arms and legs extended and shoulder- to hip-distance apart. Inhale as you lift your right arm and left leg 1 to 2 inches off the floor; switch to lifting the left arm and right leg as you exhale slowly. Alternate this “swimming” pattern for 12 to 15 repetitions.
8. Dead Bug
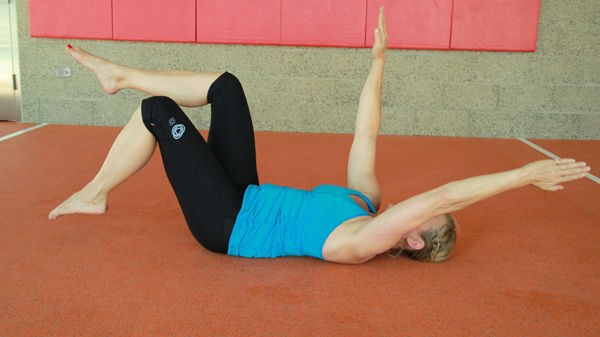
Overview: This core-stabilizing exercise helps your body move extremities while practicing to stabilize the pelvis and building transverse abdominal strength.
Directions: Start lying on your back with the knees bent as if they were resting on a coffee table. Inhale to prepare and exhale as you curl the head and tops of the shoulders off the floor. Reach the hands past your hips, being mindful to keep your lower back pressed into the floor and your pelvis stabilized. Lower one foot toward the ground while exhaling. Inhale and bring the foot back to bent-knee tabletop position and repeat on the other side. Although beginners should keep their backs pressed to the floor, the key is moving toward a neutral spine position throughout this movement. Neutral spine has a slight curve in the natural arch of the lower back, while keeping the pelvis from rocking away from the center. Repeat 20 alternating foot drops.
9. Swan
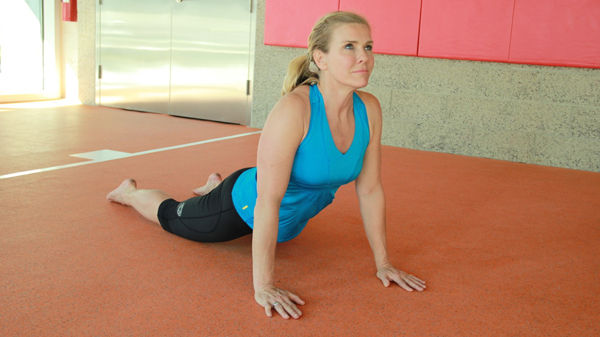
Overview: This movement helps strengthen the backside of the body and improve coordination between the upper and lower body.
Directions: Start lying face down on the floor, with the arms bent at the rib cage, the palms facing down, and the legs extended and hip-distance apart. Slowly inhale as you push up from the hands, leading with the head to a modified “cobra” position. Exhale as you lower the upper body and lift straight legs 4 to 6 inches off the floor. Alternate this rocking motion from upper-body lift to lower-body lift to create a smooth movement pattern. As you progress, extend the arms forward instead of pushing from the ground as you lift the upper body off the floor.
10. Single-leg Split
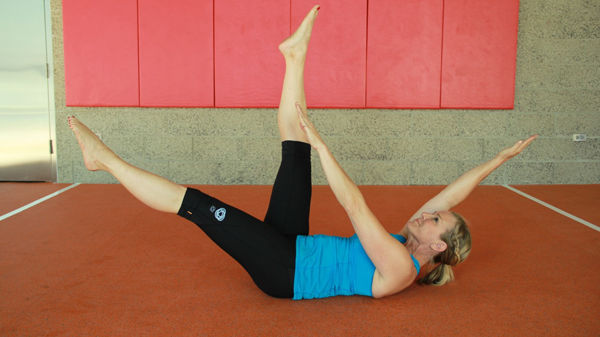
Overview: This movement strengthens the abdominal muscles and stretches the hamstrings.
Direction: Start lying down with the legs extended toward the ceiling and the shoulder blades lifted off the floor. Inhale as you bring the right leg toward the chest. Hold onto the calf or the back of the thigh to bring the leg closer to the chest; lower the left leg slightly toward the floor. Exhale and switch leg switch positions, bringing the left leg up toward the chest and the right leg toward the floor. Alternate 20 leg splits while breathing throughout the movement.


 by
by 


