by
by Plyometric exercise (plyo meaning longer and metric meaning measures) have been around since the first Olympians in Greece donned white robes and grape leaf crowns. These types of exercises are used regularly by athletes who require explosive power for their particular sport. But are plyometrics reserved only for the very athletic? The answer is NO! Plyometric exercises, when done safely and in proper amounts, can add variety to a tired workout routine, increase caloric expenditure, and help improve reactivity and coordination—no athletic ability required!
The premise behind using plyometric exercise to improve reactivity and power output comes from what’s called the “stretch shortening cycle.” This term refers to the change a muscle goes through when being eccentrically loaded and then concentrically contracted. What is actually being trained while doing plyometics is the very short period in between the eccentric (lengthening) and concentric (shortening) phases of this muscle contraction. This is called the “amortization phase” and it is a very quick moment in time when the muscle goes from being eccentrically contracted, or stretched while under load, to concentrically contracted, which is what we normally think of as flexing a muscle. When plyometrics are done quickly, as intended, the amortization phase should last less than one-quarter of a second (0.00:25). The shorter the amortization phase, the quicker a muscle goes from a long muscle to short muscle, which allows for increased force production.
It is important to understand that with plyometric training, more is not better. Because of the intensity and ground contacts involved with these types of exercises, participants must be physically prepared for this new challenge. Plyometrics should be a supplemental part of a well-rounded training program. The following chart features the number of plyos that can be included within a training program based on the athletic level of the participant.
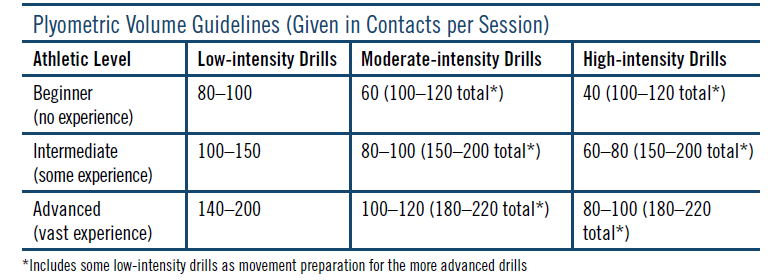
Source: Table 10-9 from the ACE Personal Trainer Manual (4th edition)
Here are several different types of plyometrics exercises that target the upper-, middle- and lower-body segments that you may want to add to your program:
Upper-body Plyometrics
Medicine Ball Power Push-up
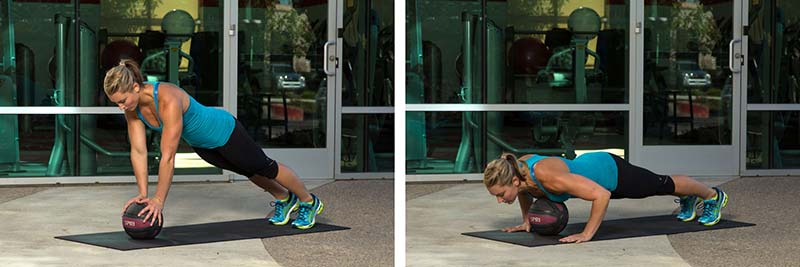
Adopt a push-up position with both hands on top of a 5- to 8-lb (~2- to 3.5-kg) medicine ball.
Quickly remove the hands and drop them to the floor slightly wider than shoulder-width apart.
Make sure to land with the elbows slightly flexed.
Continue to flex the elbows and drop the chest to almost touch the medicine ball.
Explosively extend the elbows and push up so that the hands return to the top of the ball. Note: This exercise is appropriate for elite-level clients only.
Supine Vertical Chest Toss
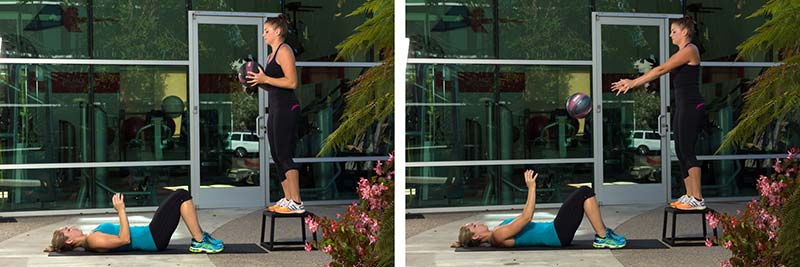
Lie supine on a mat with the arms extended upward (shoulders at approximately 90 degrees of flexion).
Have a partner stand on top of a box and hold a 2- to 8-lb (~1- to 3.5-kg) medicine ball above the exerciser’s arms.
When the partner drops the ball, catch the ball using both arms and immediately toss the ball back up to the partner.
Lower-body Plyometrics
Hops and Bounds
Hops involve taking off and landing with the same foot.
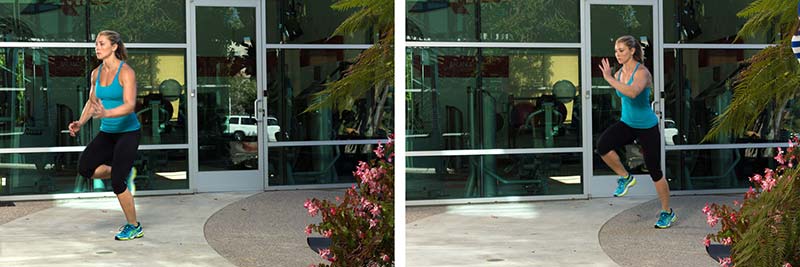
Bounds involve the process of alternating feet during the take-off and landing (e.g., taking off with the right foot and landing with the left foot).
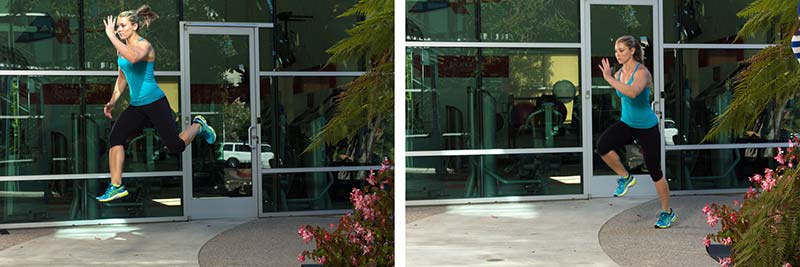
Hops and bounds emphasize horizontal speed and are performed repeatedly with no rest between actions.
Depth Jumps or Hops
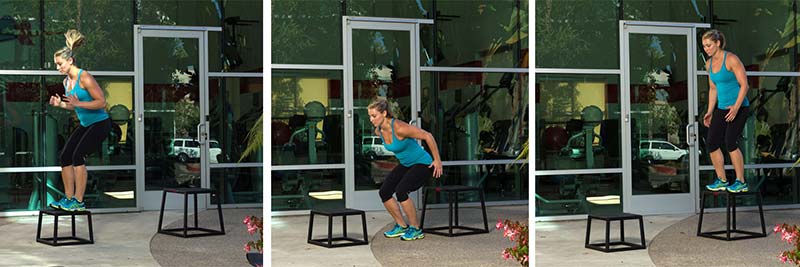
These exercises involve jumping or hopping off of a box, landing on the floor, and immediately jumping or hopping vertically, horizontally or onto another box.
Caution: These should only be done with a box equal to or less than the height of the knee, and with an experienced client.
Trunk Plyometric Exercises
Lateral Med Ball Wall Throw and Catch
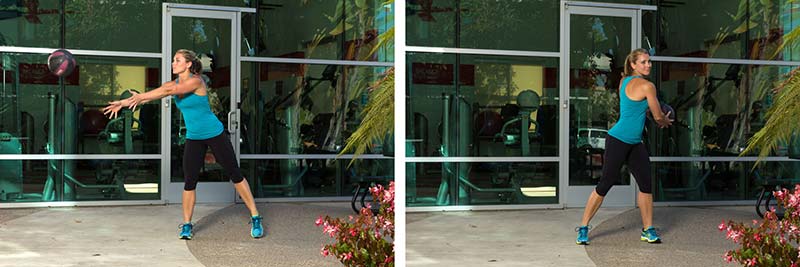
Grasp a medicine ball and stand sideways about 2 to 3 feet away from a wall. Using the hip as a starting point, rotate the body and throw the ball toward the wall, catching it back at the hip while returning to the starting position.
Med Ball Slams
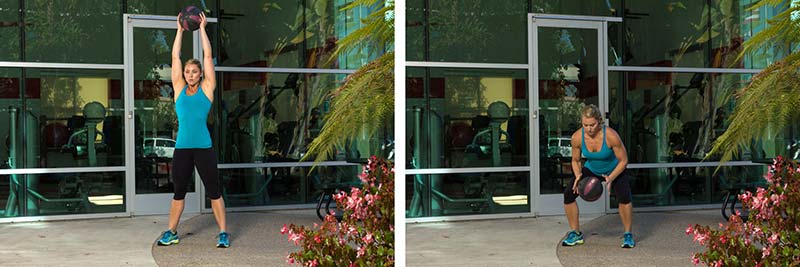
Assume a squat position while holding the med ball at the chest. Extend the whole body and raise the med ball overhead, and then quickly slam the ball down in front of the body, catching it on the way up. Repeat quickly.