With summer approaching, many people are excited about the prospect of shedding layers of cold-weather clothing and donning lighter fare. This often means exposing more skin, especially if you enjoy wearing shorts. With the goal of helping fitness seekers confidently rock those short summer shorts, I recommend the following workout routine. These exercises are great choices for targeting the muscles that contribute to toned, shapely legs, as all three movements work the hips and thighs. Add them two to three times per week to a program that also includes a balanced diet and you will feel stronger and look stunning in your summer shorts.
Squat
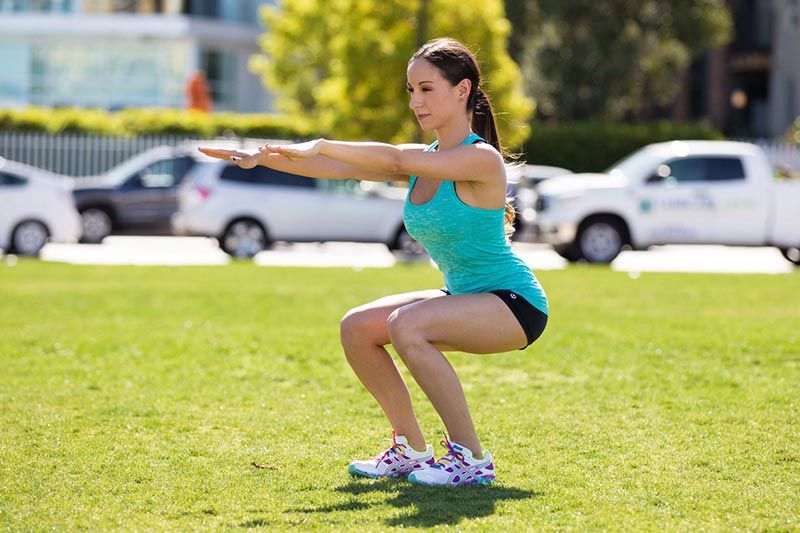
The squat is often touted as the champion of all lower-body exercises. For functionality, it is hard to beat because it essentially mimics the movement we perform each time we sit down or stand up.
Technique
To get the most out of the squat, focus squatting as low as you comfortably can, without pain in the joints, while maintaining good form. Proper technique includes keeping the spine in a neutral position (avoid rounding forward or arching backward), tracking the knees in alignment with the toes (avoid letting the knees cave inward), and keeping the whole foot flat on the floor.
Progression
Starting with just your bodyweight, perform 15 to 20 repetitions. Repeat for two to three sets. When that feels comfortable, progress by adding dumbbells (either holding them in the hands by your hips, or resting them on top of your shoulders).
Try something different
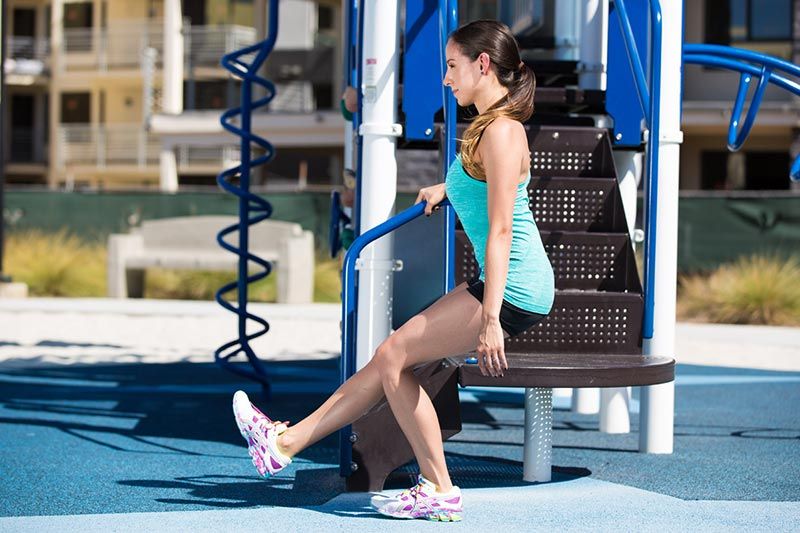
For a more advanced progression, perform a single-leg squat. Stand in front of a bench or sturdy chair and lower yourself down to a seated position using only one leg. Then stand up using both legs (as in a typical squat). Once you’ve mastered that, try sitting down and standing up with only one leg. Perform five to 10 repetitions on each leg to start, and progress to 15 to 20 repetitions as you become stronger.
Lunge
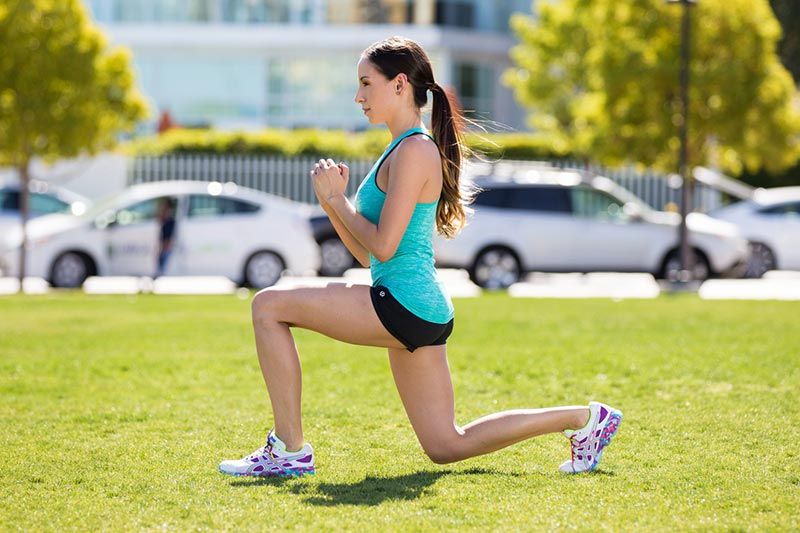
Lunging is another great lower-body exercise because it targets the hips and thighs and requires you to focus on balance, which calls upon more work from the stabilizer muscles of the hips. It is also a very functional movement if you consider, for example, that a forward lunge is an extreme version of walking.
Technique
Similar to the squat, focus on bending the knees as much as you comfortably can, without pain, while maintaining good form. Start standing with the feet hip-width apart. Step forward with one leg, landing with the heel first and then allowing the rest of the foot to plant firmly into the ground. The trick is to step far enough forward so that your front knee tracks over the toes (if you step too close, the knee will jut out over the foot and the front heel may lift off the floor). In the deepest part of the lunge, both knees should be flexed and the torso should remain upright. To return to the starting position, push off of through the front heel and bring the foot back so that you’re standing again with the feet hip-width apart. Repeat with the other leg.
Progression
Starting with just your bodyweight, perform 10 to 16 repetitions (i.e., five to eight on each leg). Repeat for two to three sets. When that feels comfortable, progress by adding dumbbells (either holding them in the hands by your hips, or resting them on top of your shoulders).
Try something different
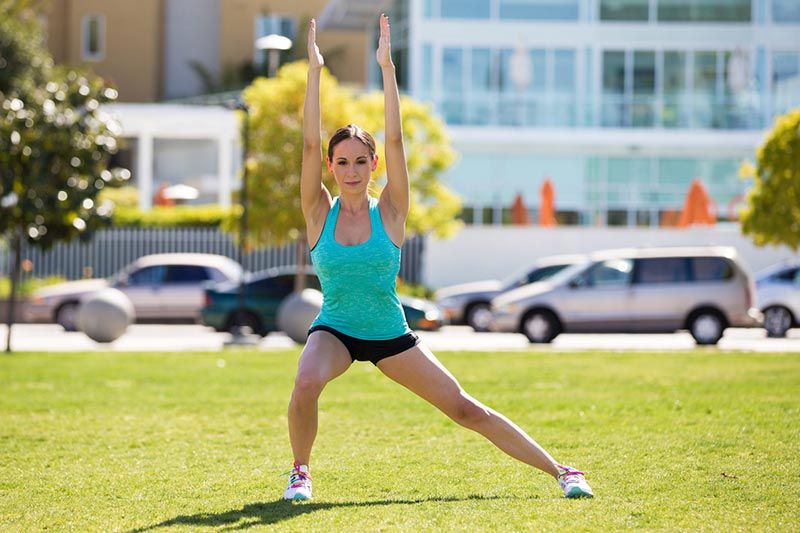
There are numerous ways to progress lunges, which include stepping in different directions (e.g., side lunge and backward lunge) and performing various movements with the arms (e.g., reach upward to add intensity to the front of the torso). Those are good options to try when you’ve mastered the basic forward lunge described above. Another effective progression is the step-up. Starting with a relatively low step height (e.g., 12 inches), step up with the right foot and bring the left foot up to tap the step beside the right foot. Step down with the left foot first, tap the right foot down on the floor beside the left foot, and then start over again with the right foot. Perform five to eight repetitions with the right foot leading before switching to the left foot.
Glute Bridge
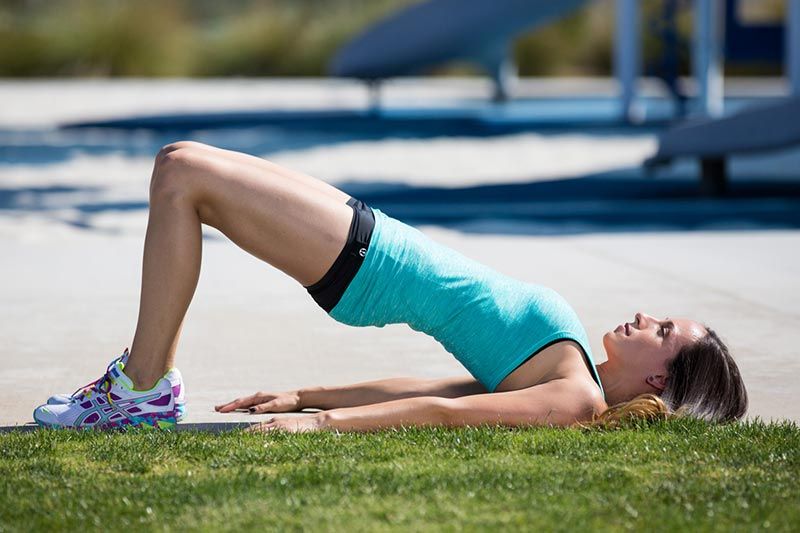
This final exercise targets the backside for an intense focus on the gluteal muscles. When performed correctly, the glute bridge stretches the front of the hips, while simultaneously activating the gluteal muscles, making for a healthier hip joint.
Technique
Lie on your back with your knees bent and the feet parallel about 12 inches away from your hips. Slowly tuck under the pelvis (as if you’re bringing your pubic bone toward your navel), push into your heels and lift your back off the floor until your hips are completely open at the top. Tucking the pelvis at the top of the movement is important for keeping the spine neutral, not arched. Hold this position for five seconds and then slowly lower the back down to the floor. You want to avoid back extension (i.e., a back bend), which could lead to unnecessary pressure in the lumbar spine. Also, an extreme arch of the back tends to take the work out of hips and legs and places stress on the anterior structures of the spine.
Progression
Starting with just your bodyweight, perform 15 to 20 repetitions. Repeat for two to three sets. When that feels comfortable, progress by resting a dumbbell on top of the pelvis and holding onto it with each hand.
Try something different
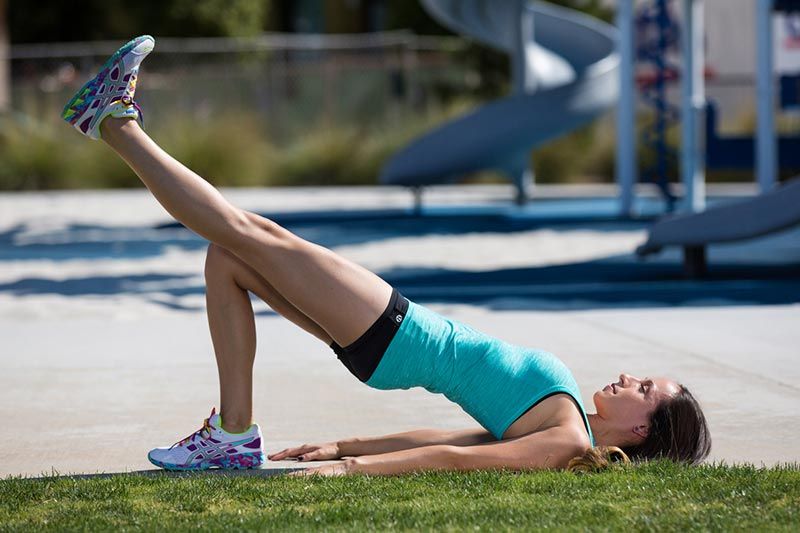
For an even more concentrated focus on the gluteals, try performing the glute bridge one leg at a time. Simply bend one knee toward the chest while you lift the hips off the floor with the opposite leg. Perform five to 10 repetitions on each leg to start, and progress to 15 to 20 repetitions as you become stronger.


 by
by 


 by
by