 by
by Back injuries happen for a variety of reason, including improper lifting, falling or traumatic accidents. Depending upon the severity of the injury, some people require surgery along with rehab and therapy. Rehabilitation is an integral aspect of spinal health to ensure proper posture, core stability, movement awareness and muscular strength surrounding the spinal discs.
The core is comprised of the axial skeleton and the muscles surrounding the spinal column. In this region, 30 muscles attach or originate between the spinal column and the abdomen, low back, pelvis and hips. These muscles transfer and receive forces between the upper and lower limbs. Therefore, core strength is vital for nearly every movement experienced within our daily lives.
Most people who suffer a back injury are eager to revisit their regular life duties and hobbies, but rushing back into life is not ideal when pain, scar tissue and weak musculature are present. When rehabilitating the spine, these three principles are important to ensure steady emotions throughout the treatment.
* Breathing is essential not only for life, but also to prevent you from holding onto stress within the musculature. When you feel stressed about your back, take three deep inhales and exhales.
* Acceptance of the present moment ensures that you don’t worry about what happened and what will happen. The human body takes time to rehabilitate and there is no quick fix to rebalancing the muscular system. This principle ensures that steady progression will be met.
*Awareness is important to motor control and movement patterns. When you are aware of your movement or posture, you are better able to break bad habits and realize what motions or positions help or hinder your back.
When medically cleared for back rehab exercises, increasing core strength is vital to reducing back pain and reintegrating movement patterns with better awareness, stability and bracing of the core. Always follow the guidelines prescribed from your medical doctor, surgeon or physical therapist. When you have been medically cleared, the following phase 1 and 2 progressions can be of great benefit to your back post-injury.
Phase 1 – Stability and Mobility
Phase one integrates basic exercises to bring awareness, strength and stabilization to the body. It is essential that these exercises, which build the foundations for the core musculature, are executed properly before progressing.
Pelvic Tilts

Purpose: This move helps bring awareness to the anterior and posterior tilting of the spine and how a neutral pelvis feels. This basic move develops postural muscles, and “wakes” up the range of motion for the pelvis and low back.
How to Perform: Lie on the ground with feet flat to the floor. Place two to three fingers on the hip bones. Tilt the pelvis toward the rib cage, flattening the back into the ground. Hold for two to three seconds and then tilt the pelvis away from the rib cage, feeling the low back lift off the ground. Hold and continue this motion. Practice for 60 seconds.
Leg Slides
Purpose: This exercise increases core strength and stability while extending the lower extremity. It also helps to maintain a neutral spine while integrating movement in the lower limbs.
How to Perform: Lying face up, place hands on the hip bones and find a neutral spine; keep the feet on the ground with knees in the air. Engage the abdominals and, as you exhale, extend your right leg and slide the heel along the ground. Return to the starting position and, while maintaining engagement, slide the left heel along the ground. Continue this motion for six to eight reps on each leg.
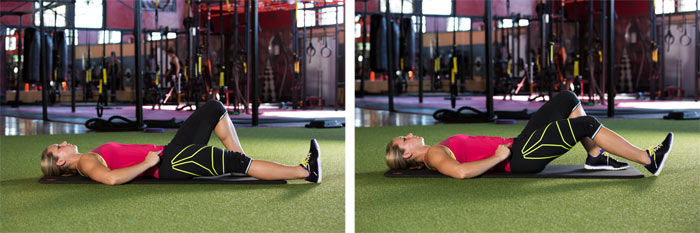
Hip Bridge

Purpose: This exercise strengthens the posterior muscles of the back, hips and legs.
How to Perform: Lie on the ground with hands next to your sides; place your heels near the gluteals. Lift the hips into the air while keeping the feet and the shoulder blades lengthened into the ground. Hold for 20 to 30 seconds.
Bird Dog
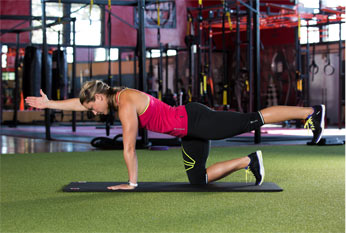
Purpose: This exercise provides stability while strengthening core and hip musculature.
How to Perform: Assume an all-fours position, with the hands under the shoulders and knees hip-distance apart. Extend the left leg behind and flex the foot. Extend the right arm in front with the thumb facing the ceiling. Keep the abdominals engaged and stabilize the left shoulder so the shoulder blade doesn’t collapse into the pose. Hold for 10 to 20 seconds and repeat on the opposite side.
Modified Side Plank
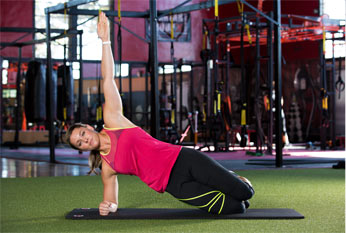
Purpose: This move strengthens the obliques and increases shoulder-blade stability and strength.
How to Perform: Sit on the floor and come onto the right side of the body. Bend the bottom knee and arm 90 degrees. Lift the hips off the ground and keep the right shoulder away from the ears. Lift the left arm overhead. Hold for 20 to 30 seconds and repeat on the opposite side.
Phase 2 – Movement
Phase two integrates more movement and includes progressed poses once phase 1 has been mastered.
Stability Ball Pelvic Tilts

How to Perform: Sit on top of a stability ball. Place your hands on the hips to bring awareness to the pelvis. Tuck the pelvis forward, feeling the core slightly contract. Follow that by tucking the pelvis back, feeling a slight arch in the low back. Continue for 60 seconds.
90-Degree Leg Slides
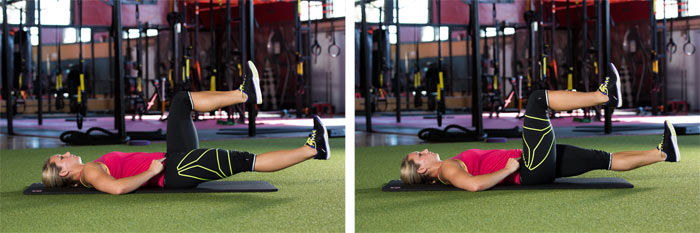
How to Perform: Lie on the floor with a neutral pelvis. Keep two to three fingers on the hip bone area. Engage the core and lift the knees to 90 degrees. Extend the right leg to a point where you feel the core engage. Return to center and maintain core engagement while extending the left leg. Continue this motion for six to eight reps on each side.
Marching Hip Bridge
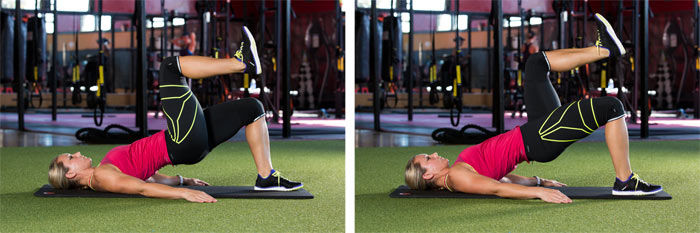
How to Perform: Lie on the ground and lift the hips into a static bridge pose. Stabilize the core and glutes as you lift the right knee toward 90 degrees, to a point where the shin is parallel to the ceiling. Release the foot and lift the leg. It is essential to maintain a neutral pelvis without allowing the hip to drop. Continue this motion for four to eight reps.
Elbow to Knee Bird Dog
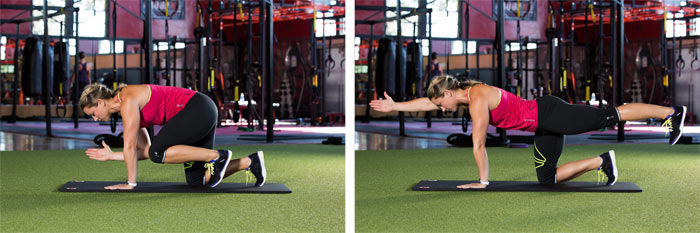
How to Perform: Assume an all-four position, with hands under the shoulders and knees hip-distance apart. Extend the left leg behind and flex the foot. Extend the right arm in front with the thumb facing the ceiling. Keep the abdominals engaged and stabilize the left shoulder so the shoulder blade doesn’t collapse into the pose. Maintain core stability and draw the elbow and knee toward each other and then extend the limbs. Complete four to six reps and then switch sides.
Modified Side Plank With Thoracic Rotation
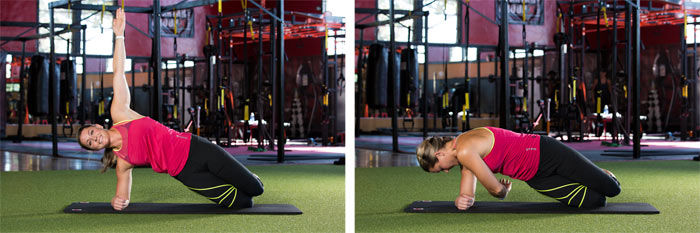
How to Perform: Sit on the floor and come onto the right side of the body. Bend the bottom knee and arm to 90 degrees. Lift the hips off the ground and keep the right shoulder away from the ears. Lift the left arm overhead. Slowly rotate the rib toward the floor and sweep the left arm under the rib cage. Rotate upward and return to the starting position. Complete four to eight repetitions before switching sides.


 by
by